Patient Telehealth Information
Checking In To Your DocsInk Telehealth Appointment
Introduction
As the patient, there is no need to download any additional software or application to your device in order to complete your telehealth appointment. The only thing you need is a smart device (smartphone, tablet, computer) that has a camera, microphone, and a wifi connection.
FIRST STEP
Appointment Reminders
Before your appointment, you will receive appointment reminders:
-
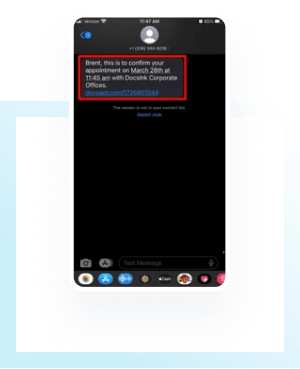
You will receive a text 24 hours before your appointment asking you to confirm your appointment.
-
If you have not declined your appointment:
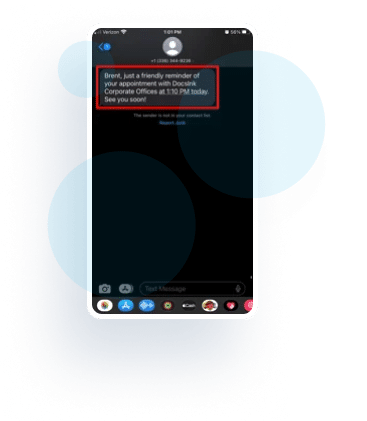
- You will receive a text reminder 1 hour before your appointment.
- Five minutes prior to your scheduled appointment, you will receive a text and/or email asking you to check in. This notification will contain your check in link.
SECOND STEP
Confirming your Appointment
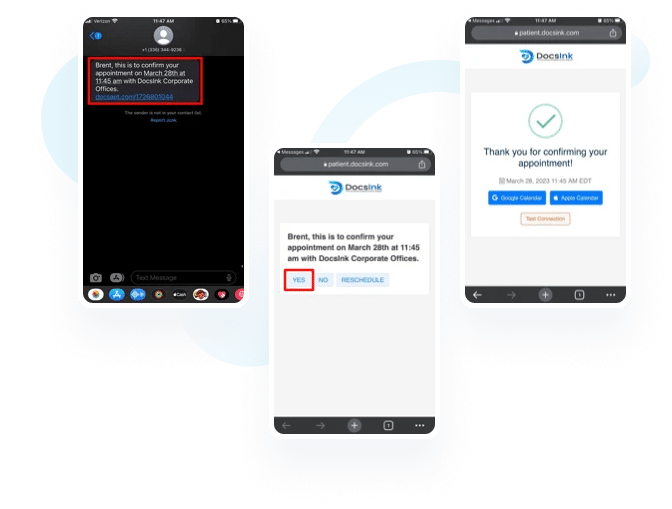
24 hours prior to your appointment, you will receive a text message to confirm your appointment. Tap the link and select “Yes” to confirm.
THIRD STEP
One Hour Notification
Before your appointment, you will receive appointment reminders:
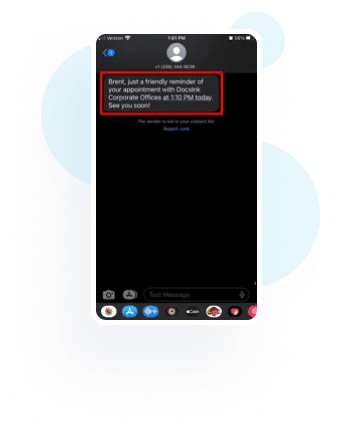
- An hour prior to your appointment, you will receive a reminder text message.
- Important: If you did not confirm your appointment from the reminder above, you will not receive this one hour reminder.
FOURTH STEP
Five Minute Check In Notification
Five minutes prior to your scheduled appointment time, you will receive a message via text and/or email to check in for your appointment.
-
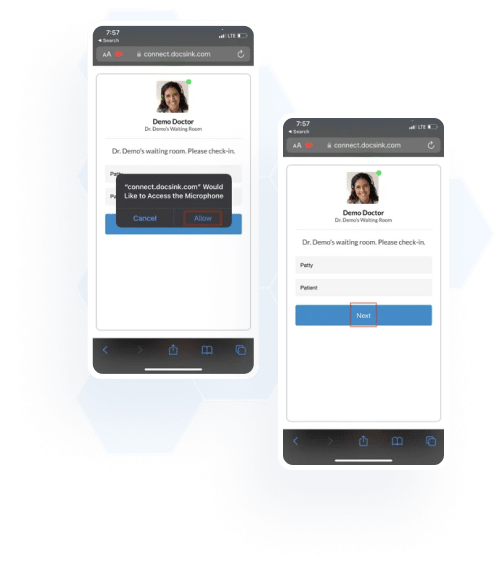
Throughout the check in process, your mobile web browser will ask you to allow access to your microphone and camera. You must allow these settings.
-
If you’d like to disable your camera and microphone before entering the telehealth call, you will be able to do so later.
-
You will be prompted to check into the virtual waiting room. Fill out the required fields and click ‘Next.’
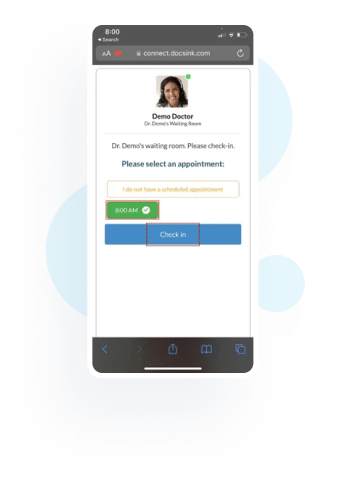
- Your doctor might have multiple appointment times throughout their day. This is where you will select your designated appointment time. Then click ‘Check-In.’
- Important: If you do not see your appointment, simply select ‘I do not have a scheduled appointment.’ Your provider will still see that you’ve checked in.
FIFTH STEP
Virtual Waiting Room
-
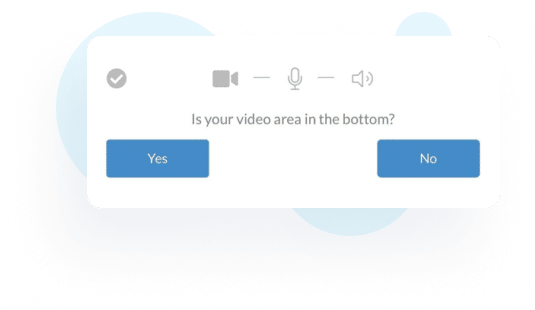
You are now checked into the virtual waiting room. At the top of your screen, you will be given the option to:
- Test your connection
- Test your microphone
- Test your camera
SIXTH STEP
Wait for your provider
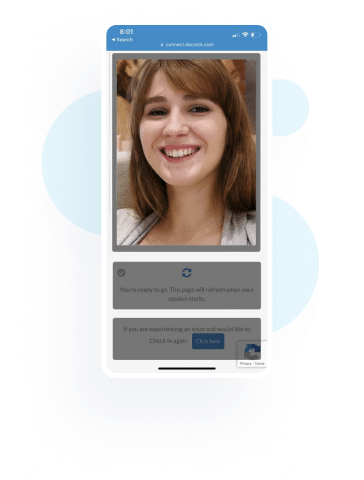
- Simply wait for your provider to join the call from this screen. Once your provider starts the call, your screen will automatically refresh.
- Important: your provider may take some time to connect with you. While you are on this screen, you are waiting to connect. Do not refresh your screen.
SEVENTH STEP
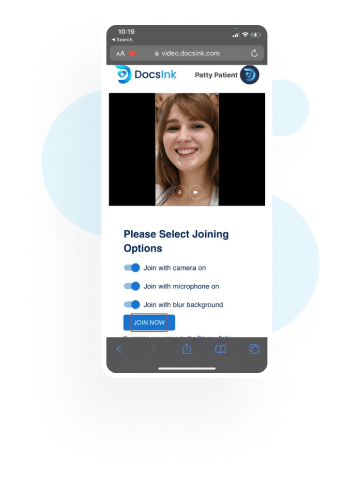
Select Your Joining Options
- You will have the option to enable or disable your microphone and camera. If your camera is enabled, you will also have the option to enable the blur background setting (pictured below).
- When ready, click ‘Join Now’ button.
FINAL STEP
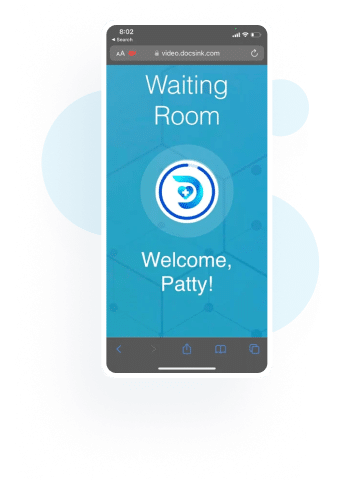
Waiting Room
You are now waiting for your provider to allow you into the session. Again, wait for your provider (pictured below). Your screen will refresh automatically when you have been allowed into the session. Do not refresh your screen.

You have successfully joined your telehealth appointment.
TROUBLESHOOTING
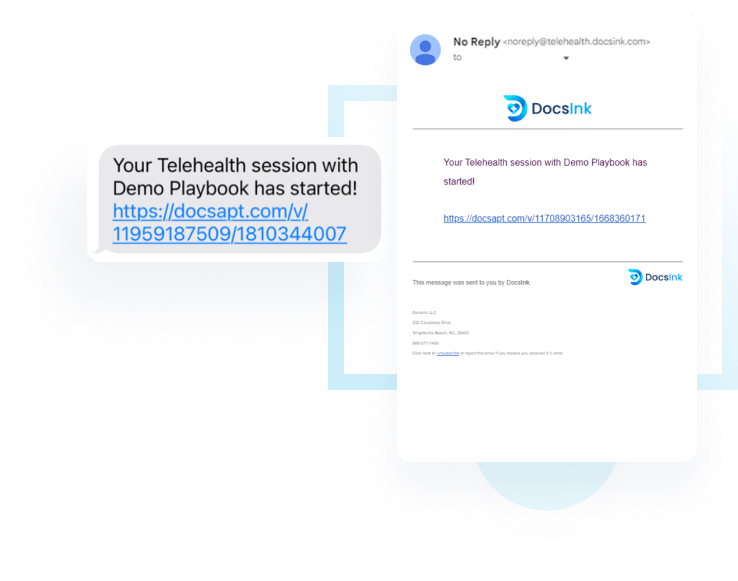
- If somewhere along your process you get removed from your waiting room or browser window, another link is always sent to you when a telehealth session is started. So you can go back to your text messages or email to find a message that says “Your Telehealth session has started!” with a link that will go straight to the session with your provider.
Primary Features
Microphone
Allows you to mute and unmute your microphone.
Video
Allows you to turn your video on or off at any time during the call.
End/Leave Call
Allows you to leave the call.
Chat
Allows users to message back and forth within the call.
Translation – You and your provider are able to set your native languages. When your provider types in their language, it will automatically translate to the selected language of each individual user.
More Options
This menu gives you more options to update your settings.
Audio: Change your default microphone and speakers
Video: Change your camera, video resolution, and blur background settings
Attach a file
You can easily attach a file with the paper clip icon next to the chat box